peace out, yo

peace out, yo

Wednesday, November 6, 2013

It's increasingly hard to put my thoughts together, which is very scary since I'm applying for a graduate program here in Indiana. HELP! But the raw truth about that is that it is so debilitating to me as a person. I can't string coherent sentences without..


sorry, spacing or blanking out, I can't have decent, meaningful conversations with other people without resorting to the words "you know?" (know, they don't), "I don't know how to explain it," (evidently), or "it's sort of like.." (really, it isn't, and you're only just confusing them further).

It's also become so much harder for me to concentrate on any one thing at one time, blogging included. I just want to scream!


!!!!!!!!!!!!!!!

But today I felt like I needed to be productive. I was also cautious about being too ambitious-- we all know how those days go-- so I decided to just do something small. Something creative, cost-effective, yummy, and small (yummy is bolded because if it ain't yummy, it ain't worth it). I decided to do some vietnamese refrigerator pickles. Have you had Vietnamese cuisine? Oh, you MUST try it.. It's out of this world. And if you have (aside from Pho, duh (get it, it rhymes OH i'm on a roll here ladies!)) you've almost certainly had these garnish-like things called Do Chua.


(image credits: http://www.teaandcookiesblog.com/2008/12/pickled-stuff.html) 

And if you are like me, you would have researched on at least 5 different do chua recipes to ascertain the best, most delicious, most fool-proof recipe, and then cited them all (here, here, here, here and here), and then given up because you can't choose one to just freakin' follow! So stop hyperventilating and listen, honey, to the words of my sagacious wisdom. Do chua will vary in taste from maker to maker. What is really important is that you balance the tastes to your desire. Know that there are really only 4 ingredients to your brining solution: 

Hot water
Vinegar
Sugar
Salt 

And then your veggies. A typical do chua as I've had it in Vietnam, had more daikon than carrots; in fact, the carrots seemed to play the sole part of providing color contrast. The daikon was the primary root. That means that you can play around with the ratios of carrots to daikon. In fact, you'll see below that my do chua doesn't even look like it has any daikon in it.. 

You're right. See, I was at Kroger on my way home and I noticed these bags of broccoli and carrot slaw on sale. They looked kinda dry, but still edible, so I picked up a couple of bags with the purpose of trying out this recipe and making a salad for dinner. Guess what? BINGO. The texture of the broccoli stem was very similar to daikon, and oh man, thank goodness I wouldn't have to julienne all those freakin' carrots and daikons into matchsticks! To me, personally, the thickness of each piece matters. I HATE how some restaurants give you thick, ugly stems.. It just doesn't represent Vietnamese food well, what with the emphasis on a balance of tastes, textures, presentation, temperatures.. Ok, I'm going to stop rambling now. Now you get what I mean about my issues putting an entry together? Very trying.

So. In 5 sentences: combine all the brining ingredients together in a glass jar/bowl, stir until homogenous and taste it. Detect the sweet, the sour and some saltiness to it-- if something is amiss, add a little more here and there until you are satisfied. I used about 1/2 cup of vinegar to 1 cup water to 1 tsp salt to 4 tbs sugar. Don't worry! If it doesn't taste right, you can always fix it later.

Another 5 sentences: Put some groovy music on and whip out your bottle of patience/vodka-- you're gonna need it if you're julienning all these veggies. Or else, cheat and get a bag of that slaw like meeeee! How much veggies to chop up? Well, as much as you'd like to have! The bag I used was 10 ounces total and fit perfectly into one quart-sized mason jar. 

Last 5 sentences: Stuff the julienned veggies in the jar, top off with the brining solution-- the proportions above should fit nicely into a quart-sized mason jar. Not enough solution? Make some more! Use a glass container instead of plastic due to the acidic nature of the solution. Some recipes suggest a 10 minute brining time before consuming, others say 3 days, and personally I think it depends on your needs and preferences and thickness of the julienned veggies, but whatever the case, store in the fridge and enjoy!


Did you really count to see if I made the self-imposed sentence limit? Well, then, you're just neurotic.


Friday, October 25, 2013

Hiiiiiiii..


Well, isn't this awkward. I guess I haven't posted in a long time, and I feel weird trying to resume a nonchalance about posting recipes.. like "Hi! Missed me?" only to hear crickets, and people giving me crazy eyes before turning back to their drinks.. Oh yeah I forgot to lay the scene for you-- I was pretending to enter a bar.


Thing is, I HAVE been cooking a lot, and making some damn good food, but these pictures.. this sterile layout.. is killing me. And when I had so excitedly told my friend about how I wanted to revamp things completely (urgh let's not go there) it came to naught. So I'm sorry to have to subject you to this, but.. All this (WAVES HANDS WIDELY) is going to be here for a while (sucks in breath).. yeap, yeap, yeap.

and, not to list excuses, but everytime I cook something, I just go straight to eating it. No photographs, no piling the food nicely on a plate.. I just want to shove it in my mouth. Have I told you? Winter is almost here. I think it's a seasonal thing.

so.

well.

What do I have for you? I have made some DEEEEELISHHHHIOUSSS items, to whet your appetite, how about a Cantonese-styled Claypot rice? I also made several varieties of pasta, had great results with a pork schnitzel (I AM SO PROUD!) and also, a very delicious pumpkin bread that I unfortunately have eaten and cannot make again since Julian is opposed to pumpkin. Remind me again, why did I marry him?


Because he maketh the hearth melt-eth so..

 So get ready to rumble! I will be posting some kick-ass recipes soon. Also, just know that it will take a while.. I'm going back to nap. 


Monday, August 12, 2013

blueberry jam, noch einmal


and so yes, I revisited the great blueberry jam adventure of July 2013. I mean, wouldn't they make awesome presents for friends back home? Friends who have never attempted to can or pickle veggies, or jar fruit and preserves? Basically, if I might say so with a hint of contempt, urbanites? Good Gravy, urbanites. I'd be the hippiest of the lot, the kid so in touch with Mother Nature, I'd might as well give birth, natural-birth style, while singing battle-hymns from Enya.


No thanks.

Honestly, there isn't much for me to add, except that these traveled very well packed snugly in a suitcase. Can I just repeat this? I can't help myself.


that said, proper measurements and instructions, I think, are in order:


MTHWL Blueberry Jam

produces just over 80 oz of jam


ingredients

5-6 pints of blueberries to produce 6.5 cups of crushed berries (directions below)
3.5 cups of sugar; reserve the half cup for mixing into the pectin (so 3 cups of sugar in a big bowl, then half cup of sugar in a small bowl to be mixed in with the pectin)
1 packet of sure-jell pectin for reduced sugar recipes (pink box)
1/2 cup water
1/4 cup lemon juice (freshly squeezed or otherwise)


special equipment 

10x 8 oz canning jars, or any other container, cleaned and sterilized **
1 medium and 2 large, tall pots (if possible, if not, one will do, but processing the jam will take longer)
steaming racks or canning racks to suspend jars in hot water (i've read that towels folded over and lain on the bottom of the pot works too, but have never tried it. i should though)
funnel (ideal), or a pair of steady hands, a ladle, and a hot, clean, sterilized moist towel to wipe up drips (drop it into the pot of boiling water sitting on the side)
special immediate note: be kind to yourself and check to make sure that even after standing your jars upright on the steaming rack (or otherwise) in your tall pot, there is at least 4 inches of space above it to account for the boiling water. see if you can fit all 10 jars (I highly doubt it) in one of your large pots. if not, you will need another, or have to process the jams in two batches)
jar-lifter, secure tongs, or any other smart apparatus to help you pull your jars of processed jams out of the boiling water


directions

1) clean and sterilize your canning jars. I've used a quart jar before to gift to Pan's mom and pyrex containers for quantities that I will be consuming immediately at home, and thus doesn't need to be sealed, but in general, i find 8 and 12 ounce jars to be the most ideal for gifting and personal consumption.

I clean and sterilize my jars by running them through the washing machine, and then drying them off quickly by popping them into the oven set to 240 dF. I only take them out of the oven just before I ladle the jam in. That way, I am assured that the jars and lids are kept clean.


2) Place a metal spoon and plate in the freezer to test that the jam has set. (I always forget this step and scramble to prepare some ice water as a substitute) At this time, I also place the one/two large, tall pots filled a third with water on a medium heat so that it gets to a unbearably warm temperature by the time it is needed.

3) prepare your berries. I find that 5 very fresh pints of berries would suffice, although to be very careful, I'd buy 6, just in case you come across some mouldy or badly bruised berries. Rinse them several times in water, removing all bruised and battered berries, stems, or foreign material.


Pulse them in your blender using the chop function until barely chopped up. You will still get several whole berries, and that's fine. Too smooth, and you'll likely get a blueberry spread-texture instead of a chunky, fruit-filled jam. I do this in batches, measuring out 6.5 cups of chopped fruit, and transfer it into the medium-sized pot. 


4) Place your pot on a medium heat. Add your water, lemon juice, and your sugar-pectin mix, stir until the sugar and pectin has been thoroughly distributed and dissolved. Turn up the heat and let your mixture come to a rapid boil (ie the mixture does not stop bubbling even when you stir it). It will foam, and turn into a most worrying shade of magenta.

At this point in time, I would have taken my jars and lids out from the oven, and assembled them.


5) Pour in the rest of the sugar (3 cups) and stir away. Make sure that all the sugar is dissolved-- no lumps-- and bring it back up to a hard boil for one full minute. I'm not sure what the persnickity chemical reaction is that requires such diligent timing, but just give it your concentration for one minute. Don't let it boil past that timing, or under the timing.

6) Take out your frozen spoon and plate. spoon some of your jam out with the ladle and drip it onto the spoon and/or plate. Wait just a minute to see if it sets. It should seem firm to the touch, and should not run when you tilt the plate. Taste the jam on the spoon. You should be able to feel the "set-ness" of the jam on your tongue. It should take heavy from the fruit content; don't expect it to have a jelly-like consistency, though. It's not a jelly!

Once you are satisfied with the texture, work quickly to ladle/funnel it into the jars, wiping off spills immediately. Make sure that the rims and grooves are completely clean. Try to minimize the number of bubbles you form on the surface. If you do see any, take a sharp knife and burst them.

Screw on the lids tightly, and it's on to the second-last step-- the processing!


 7) Set your jars in your processing pots that have been prepared earlier. Take care that the water is not too hot-- or else the glass might crack from the sudden spike in temperature-- and top it off with cool water.  Your jars should be submerged in at least 2 inches of water. Arrange them snugly to make sure that they do not topple over. I suspect that will cause your jars not to seal properly-- this happened to one of my jars. Bring to a boil, and continue to boil for 5-10 minutes. Mine normally boil for about 8 minutes.


8) Check to make sure that all the lids are concave, and you can't press them down to make the popping noise which tells you that the seal has been compromised. As you can see above, all the seals are down, which basically means you've done well.  If some jars fail to seal, I've read that you should pour the jam out, bring it back to a boil, and basically reprocess the whole thing. Personally, I'd just eat that jar first, or give it to a close friend who trusts that you are not out to give them botulism, and tell them to eat it immediately. Honestly it's shouldn't be a big deal-- this stuff tastes so good on toast, yoghurt, baking, ice cream, pancakes and on it's own, it wouldn't last long enough to give you any cause for concern!

Set your jam jars aside in a cool, dark location to let them cool down and rest. Try not to mess with them! A neat trick I've learnt is to unscrew the rings, being careful not to upset the lids, to let them dry out. Can you see how the jars on the right of the picture above are ring-less?

Sure enough, when I unscrewed the lids, there was residual water left over from the processing. No wonder my lids kept on getting rusty! Don't forget to screw them back on before you gift them, though! :)


Friday, July 26, 2013

Blueberry Jam


Julian and I played soccer in the evening, and working out gave me a burst of energy so strong, that at one in the morning, I decided I was going to tackle making Blueberry Jam. It's currently 2:57, everything is done, most of the washing up has been completed (by me), and the jam is delicious. I WIN!


Photo credits http://health.usnews.com/health-news/diet-fitness/slideshows/8-superfoods-and-their-alternatives/2 (7/26/2013)


I wish I took more pictures, but more importantly, my notes:

I riffed off my favorite pick your own website and the jamming instructions that come with every packet of sure-jell pectin. Riffed because fearful as I am of botulism and inadvertantly giving someone food poisoning, I cannot, and will not, consume deathly sweet jam. It's just insane to cover up the delicious taste of fruit with so much sugar. I know I know, it's dangerous to reduce the amount of sugar in each recipe. It f-s up the jelling, it would not set, the food will not be preserved properly.. Yes, yes, but taste just matters more. Well, at least to me. So, I fiddled with the proportions and here's where things stand right now*:

From 5pints= 5 pounds of blueberries, after gobbling many and treating Poppy and picking out the mushy ones (and saving some as a snack tomorrow), I chopped up the rest in my blender and ended up with 6 cups of blueberries, which is 1/2 cup less than Ball, and significantly more than pickyourown. I also used 5 tbs of lemon juice (from the plastic lemon.. yes yes, i did not use fresh lemon juice, THE ABOMINATION!!) which is much more than the 1/4 cup = 4 tbs by pickyourown and suggested 2 tbs by Ball, 3.5 cups of sugar instead of the 4.5 that both recipes called for, 1 packet pectin, which is consistent with Ball and less than pickyourown, and instead of 1/2 cup of water as suggested by both, I felt dangerous and dribbled in less than that.

HA! I'm a rebel!


Yeah, I feel so badass! Except that I don't have that piercing, and umm, I'm not a boy. I also have ears, fyi.

So, taste test: I couldnt help but eat some, hot and unjelled. Top notes of true-blue blueberries and floral elements, middle notes of the countryside, and bottom notes of sugary sweetness. Still too sweet, damn it! But hey, I had stressed out about reducing the sugar and the whole batch not jelling, but that worked, so all's not lost?

So I guess my experiment showed me that my judgement about the sugar content is correct-- it should be reduced. But by how much? Well, only multiple experiments will tell. Until I get more canning jars and blueberries go on sale again, this is all i've got.

I seriously think that 2.75 cups of sugar could do it. Eh, maybe 3 cups next time. There is genuinely nothing sadder than your jam not setting. Wait, sorry, correction. No, I was very, very sad when one of my glass jars broke after I set it in the hot water. It just upped and died. I shouldn't have waited to put it in. Let that be a warning to all ye who make this jam! Place it in your hot water bath asap. If you can't fit all your jam jars into one pot, set another one up. And don't plonk it in. Ease it in gently like a newborn babe. Not that you would drop a baby into a pot of boiling water.. Would you?


Pictures in the morning! It's 3:22am you assholes, and I need to sleep.


EDIT: 

Pictures are in! Sorry, some of the shittiest photos I've ever taken. BUT! The jams are a beautiful, jewel-toned delight. They jelled well, and the result is a thick, fruity jam. I am glad I processed the fruit coarsely-- lots of delicious chunks that spread evenly enough without it feeling like a jelly. Very rustic and comforting-- check out the closeup of the jam in the pyrex.


  Chunky, luscious jam. I didn't bother canning this one because I was going to eat it the next morning and consume it within a week. 


 Just look at how it spreads.. Deep, rich color, studded with fruit pieces. Not too sweet.. Perfect even without butter. 


Surprisingly, not to sweet, even when eaten straight with a spoon. Perhaps 3.5 cups is truly a good balance. Any sweeter and it would have tasted store-bought. Well done, Michelle. And yes, I am gifting that quart jar to Pan's mom in return for afternoon teas. I am so looking forward to scones, cream and this gorgeous blueberry jam!


* I followed the cooked jam instructions that come with each packet of sure-jell pectin for less or no sugar (pink box).  I've never ever followed any recipe directly when canning, and I've only had successes the three times I've made jams and jellies (Pomegranate jelly, apple jelly, and this jam), so I'm sticking with it.


Monday, June 17, 2013

super simple garlic stir-fried kailan


This is a super simple veggie dish that takes literally minutes from start to finish, and will be a great accompaniment to noodles, rice, or potatoes. it's that versatile.

I'm using kailan, or Chinese broccoli. It's one of my favorites because the stem is sweet and crunchy; you want to retain that crunch when you cook it. It tastes like broccoli, but flavor and texture-wise, it's more superior. But you can substitute this dish with broccoli in a pinch.


Our kailan was flowering. so pretty! Too bad, you're going to be scalded in a pot of hot water soon. Heh heh heh.


I like to splice the stems so they cook thoroughly and are done the same time the leaves are done. That way you get fresh, lively-tasting veggies, not veggies that have been boiled to the point of death. Or as the Phantom of the Opera would say, "past the point of nooooo retuuuuurn.."

To do this, just slit the stem in half lengthways, and then slice them again to make quarters, but only slice about halfway through the stem so basically, half of the stem would be whole, a quarter will be sliced in half, and the last quarter is quartered. Just look at the one stalk at the bottom of the turquoise cutting pad above if you are confused.

I also pull of all the larger leaves and cut them in half lengthways. That way you don't have huge pieces of leaves in your mouth at one go.

Rinse them well in water. Sometimes they can be dusted in dirt.


Bring just enough water to cover them to a boil, and once at rapid boil, chuck all your vegetables in. Once the water comes back to a rapid boil, shut your burner off, and drain the water off.  The remaining water will steam up and keep your dish nice and moist.


Return your pot to the still-hot stove, add a tablespoon or two of your delicious garlic oil, season with salt, or if you prefer, soy sauce or even oyster sauce (very Cantonese), mix it up, and serve! *

It's really that simple. You just use the residual heat from your stove top to heat up the oil and mix your veggies up to coat them in the garlicky, salty goodness.  Today it is eaten as part of our lunch together with savory steamed fish and a peppery pork-rib soup.


* When do you use which? I tend to prefer salt over soy sauce for simple vegetable dishes. When the accompanying dishes are as light-tasting as our lunch was, I would just use salt. If not, the flavors of the oyster sauce might over-power the fish. I am a sucker for oyster sauce though. I'd lick it straight out of the bottle at times. Shhhhhhh..


beet tops beats beets


so many things have happened since, so how about a little pictionary to get us going?


So? So? Did you get it??? 


HEH HEH HEH. Like my girl Beyonce always said ,"if you like it then you should have put a ring on it". 

Ok. Back to food. 


Today I really want to talk about beets. Specifically, beet tops. We were at the farmer's market last weekend just browsing and enjoying ourselves, and towards the end, before we were going to leave for brunch (me hungry) my future mother-in-law thought we should get some nice red beets to roast for a salad. Good idea! I thought to myself, and since we were running out of time, I volunteered to quickly run and get some.

I had seen two farmers set up tables side by side, both full of deep red beets, so I made a bee-line straight for them. But when I got there, I was stunned with the ethical decision of which farmer to purchase from. I mean, how to do buy from one farmer and not the other? Especially when they were both looking at me, hoping to make the sale? I mean, one guy's bundles had bigger beets than the other, but is that reason enough to purchase from him? Could my greed for big beets truly lead me to prefer one person's contributions over another's? 

I mean, it basically looked like this: 


To a normal person, this should be a no-brainer. But I am no normal person. No, I'm Michelle Lee. 

Disclaimer: neither of them were pushy with me. They just had large, soulful yet kindly eyes that only hardworking farmers could possess, encased by crinkled, weathered skin full of crows-feet from toiling under the hot midwestern sun. Inside, my heart was crumbling like a nice, crumbly blue cheese. 

Damn this shit! It was hard. So I lingered, glancing surreptitiously from pile to pile, trying to make my mind up. Jeez man, it was a toughie. I mean, I've been through moral dilemmas deciding which orange to buy at the grocery store, but this, this was something else. This brought shopping to a whole new level of depravity. 

So I decided to test their culinary knowledge. I asked the dude on the right (the guy with the smaller beets) "Are these tops edible?", and he told me, fingering them gorgeous leaves with fat, dirt-encrusted fingers that yep, they were edible, just cut them off just after the leaves because the stems were too fibrous, and you can stir fry them with garlic and whatnot. 

"mmmmm", said my brain. Some of my garlic oil, a scattering of salt, maybe some bacon?
"I"LL TAKE 'EM!" I blurted out, even before I had started on a mental pros and cons list of which dude to buy from*. Shit.

Well, I can't undo what I said, so I handed over my four bucks and accepted my load. I looked at it. the beets were small and looked like they would have benefitted from another week in the ground. And then I glanced over again at the forlorn, defeater farmer to my left. (He was still smiling, bless his heart) His beets were bigger. Shit.

Curse me and my desire to make ethical choices! If I had gone with a caveman-eque instinct of bigger= better, I would have made an instantaneous, totally gratifying decision of buying the bigger beets. And yet I let myself be lowered into the pit of trickery by my own mind.

"These tops better be edible" I grumbled to my brain myself, and stalked off. **


Look at how beautiful these leaves are! They were seriously crisp after rinsing them in cold water-- they would literally shatter if I exerted too much pressure on the leaves. 
 
We had them for lunch the next day. Totes delicious. It tastes really earthy, like spinach. The deep red from the veins leach out, painting the whole dish a pretty pink.  This picture is from the end of the meal.


Here's the recipe. 

I highly recommend you get some fresh beets from your farmer's market for the freshest, most pesticide-free tops. 


Have you NOT had beets before??? Well, then, go get some. NOW! They are healthy, delicious, (insert: SUPPORT LOCAL!!!) and there are so many ways to eat them! I particularly like them roasted and then sliced up and served with meatballs, olives, some good bread and garlic oil for a light lunch. Or grated raw into a salad. Or boiled and cubed or pickled or pureed into a soup. 

Sautéed Beet Tops 
Serves 2-4 depending on the number of side dishes and how big (duh) your bunch of greens are


Ingredients:

A big bunch of beet greens, trimmed off where the leaves start, rinsed in cold water
1 tbs garlic oil
a generous pinch of salt
1/2 Chinese preserved sausage (I'm sure bacon or even Italian sausage would be a great sub) sliced thinly on the diagonal ***


Method:

Chop your beet leaves in bunches to a coarse chiffonade. So each leave is chopped approximately to 5 pieces lengthwise? Does that make sense? Will this picture below help? Can you see how this is one bunch and I went through from right to left making 5 cuts across the whole bunch from top to bottom?


Bring a heavy skillet to medium heat, when it starts to smoke, add your meat, stir to prevent burning. You can choose to either wipe off the oil rendered, or leave it as is. I choose to drain it off, because we eat a lot of animal fat is it is already, and I have this strange conviction that this grease is thicker and slicks heavier than vegetable oil. Don't want it here.

Add your garlic oil, let it brown, and add your salt now. It allows the salt to disperse around the leaves better, and you don't get some clumps of super salty leaves, and clumps of tasteless leaves.

Add your beet greens here, and stir vigorously. These leaves cook extraordinarily fast-- faster than spinach-- so a minute or two is sufficient on the stove. Once they wilt, immediately turn the heat off and keep on stirring. They will cook down quickly. Do not overcook. This photo below shows when it is done.


Serve as a side accompaniment to other dishes. Enjoy!


*for your info, this would have included the model and conditions of their trucks parked behind them, their wives' look and demeanor, their clothing and their personality. I mean, I'm SOOOO not shallow.


** maybe my brain had the last laugh-- the tops turned out to be a super delicious mistake. Fine, brain, you win.


*** I like Chinese sausage here because it's slightly sweet. If you use bacon, fry it til crisp, and then cut it up. If you are using Italian sausage, maybe you can consider making this dish with cubed potatoes? Somehow I think that some potato would be needed for that. 

Friday, May 24, 2013

Quintessential Garlic Oil


I don't know why it took me so long to come up with this, and I don't know why it took me so long to post this. It is imperative you have this at all times in your fridge!


So Pan and I are fans of garlic. I use it often, and there is a garlicky, peppery pork rib soup that we love to have which uses about 60 cloves at one go, so it's a no-brainer that we purchase lots of garlic. But peeling every single bulb is sometimes very trying on my nerves, especially when those papery skins go flying.. Sure there are little culinary tricks to help, but when i've got my wok to smoking point on the stove, and need to add the garlic quickly! quickly!, i don't want no fuss at all, ma'am.

So we buy garlic in bulk, and peeled. When we say bulk, we mean 3 pounds of no-fuss garlicky goodness. We give some away, but more often than not some of the garlic start to grow mould in the bag. Never thought it was possible, but trust me. It's not a pleasant sight.

Instead of letting it go to waste, or frantically try to incorporate it in EVERY dish, I decided one day to make a whole pot full of garlic oil. It's so simple, and it will change your life forever.


Start with smashing bulbs of garlic. You can work with as much or as little garlic as you'd like, but honestly if you're going to get into it, you might as well make a bigger portion. They keep well both in the fridge and freezer, and is so easy to use, you'll find yourself drizzling it over just about anything.

I've smashed them both using the flat side of a butcher's knife, and using a motar and pestle. No preference over either. You can do a coarse or fine smash, or a mixture. Frankly, I don't really care and neither should you. There are many other things to worry about, such as making sure your little fur baby doesn't pee on the carpet again, or that you remember to take the garbage out for pickup.

Go for a proportion of about 1 part garlic to 1.5 parts oil. You can play around as much as you like, but i've found that this ratio allows for a very aromatic and flavorful oil that isn't too pungent or weak. Just make sure that there is sufficient oil to cover the garlic as you heat it gently.


As mentioned, heat it gently, stirring occasionally. I let it sit on the stove for 1/2 hour, sometimes more. Make sure it does not burn. Don't go over an hour though, I did it once and somehow it didn't taste quite right.


Store in airtight container in the fridge. You can opt to strain out the garlic, or leave it in. I leave it in. Why waste? Mine is about a month old in the fridge and still going strong.


USES

1) Stir-frys
2) Vegetable soups
3) Salad dressing
4) Condiments (heat the oil with the garlic up until the garlic turns medium brown color-- you probably want a finer mash for this)
5) Dipping crusty bread
6) Making pasta sauces, both tomato-based and oil-based (eg aglio olio, anchovies etc)
7) Drizzling over home-made pizza
8) Drizzling over hummus and other creamy dips

go bananas with it!


PS: don't freak out if some garlic turn green. It's a harmless chemical process called oxidation. Proceed to eat.

Monday, May 20, 2013

My Bell Pepper (and pasta sauce) Soup


Yeah.. so I'm shameless. But don't you hate how pasta recipes just seem to always call for one and three quarters of a jar of tomato sauce? Not two, but one and three quarters. You'd almost always find a jar of pasta sauce in my fridge, poor babe.

This was my cure for the poor quarter cup of pasta sauce languishing away..


Red Bell Pepper and Pasta Sauce Soup


And actually, I'm not ashamed, because it is so, sooooo damned good. I used to think that celery was the vegetable of choice (I've had 6 bowls of that stuff in the past two weeks. Just thinking of it should make any normal person shudder, but I'd gladly dig into some right now!) but guess what? This takes the cake. A rich, decadent cake..


Recipe


1 red bell pepper (red>orange>yellow, NO green!)
1/2 vidalia onion, coarsely diced
1/2 russet baking potato, skinned and coarsely diced
1.5 tbs butter
2 tbs garlic oil
1/2 cup good chicken stock
1.5 cups water
Leftover tomato-based pasta sauce (marinara's the best)-- up to 1/3 cup.
salt, pepper to taste


There is only one additional step to this recipe, other than that, it's basically the same Mother Vegetable Soup recipe-- and that is to blanch the pepper in hot water so that the skin peels right off. You could char it so the skin blisters, but hey, too much work.

Bring a medium pot of water to boil. Score the skin of the pepper at the ends and top and around the sides. Once the water comes to a rapid boil, lower the pepper in, and let it boil away for about 10 minutes, turning occasionally so that all sides are boiled thoroughly.

Pour the hot water away and fill the pot with cold water to cool the pepper down. When cool enough to handle, peel the skin off. If you can't get it all off, it's ok.

Roughly dice, and you're ready to rock and roll!


In the same pot (wiped down of course), add the butter and garlic oil and let it sizzle at medium heat. Add your diced onion AND the bell pepper so that the pepper gets some of that hot action.


Stir fry for about 5 minutes-- you'll see the onion turning translucent, then add your diced potato. Season with salt and coarse black pepper, add in your pasta sauce. Fry until the edges are slightly brown (about 5 more minutes(, then add in the chicken stock and water. Bring to a boil, and let it simmer for 20 minutes.

Turn off the heat and let it cool before attempting to blitz it in the blender.

You're basically following the same Mother Vegetable Soup Recipe.. except that this time, the liquids are altered to make way for the pasta sauce. Also, the serving size is smaller. It might be because I couldn't stop spooning the stuff from the blender straight to my watering mouth?

I can imagine this being an excellent side to a grilled cheese sandwich, or if you were to crack an egg into the pot while reheating/bowl before zapping in the microwave or, oh! meatballs! this soup could be a super hearty meal on its own. 

Looking forward to lunch tomorrow! PS: I have the worst lighting ever.


Friday, May 3, 2013

The Mother Vegetable Soup


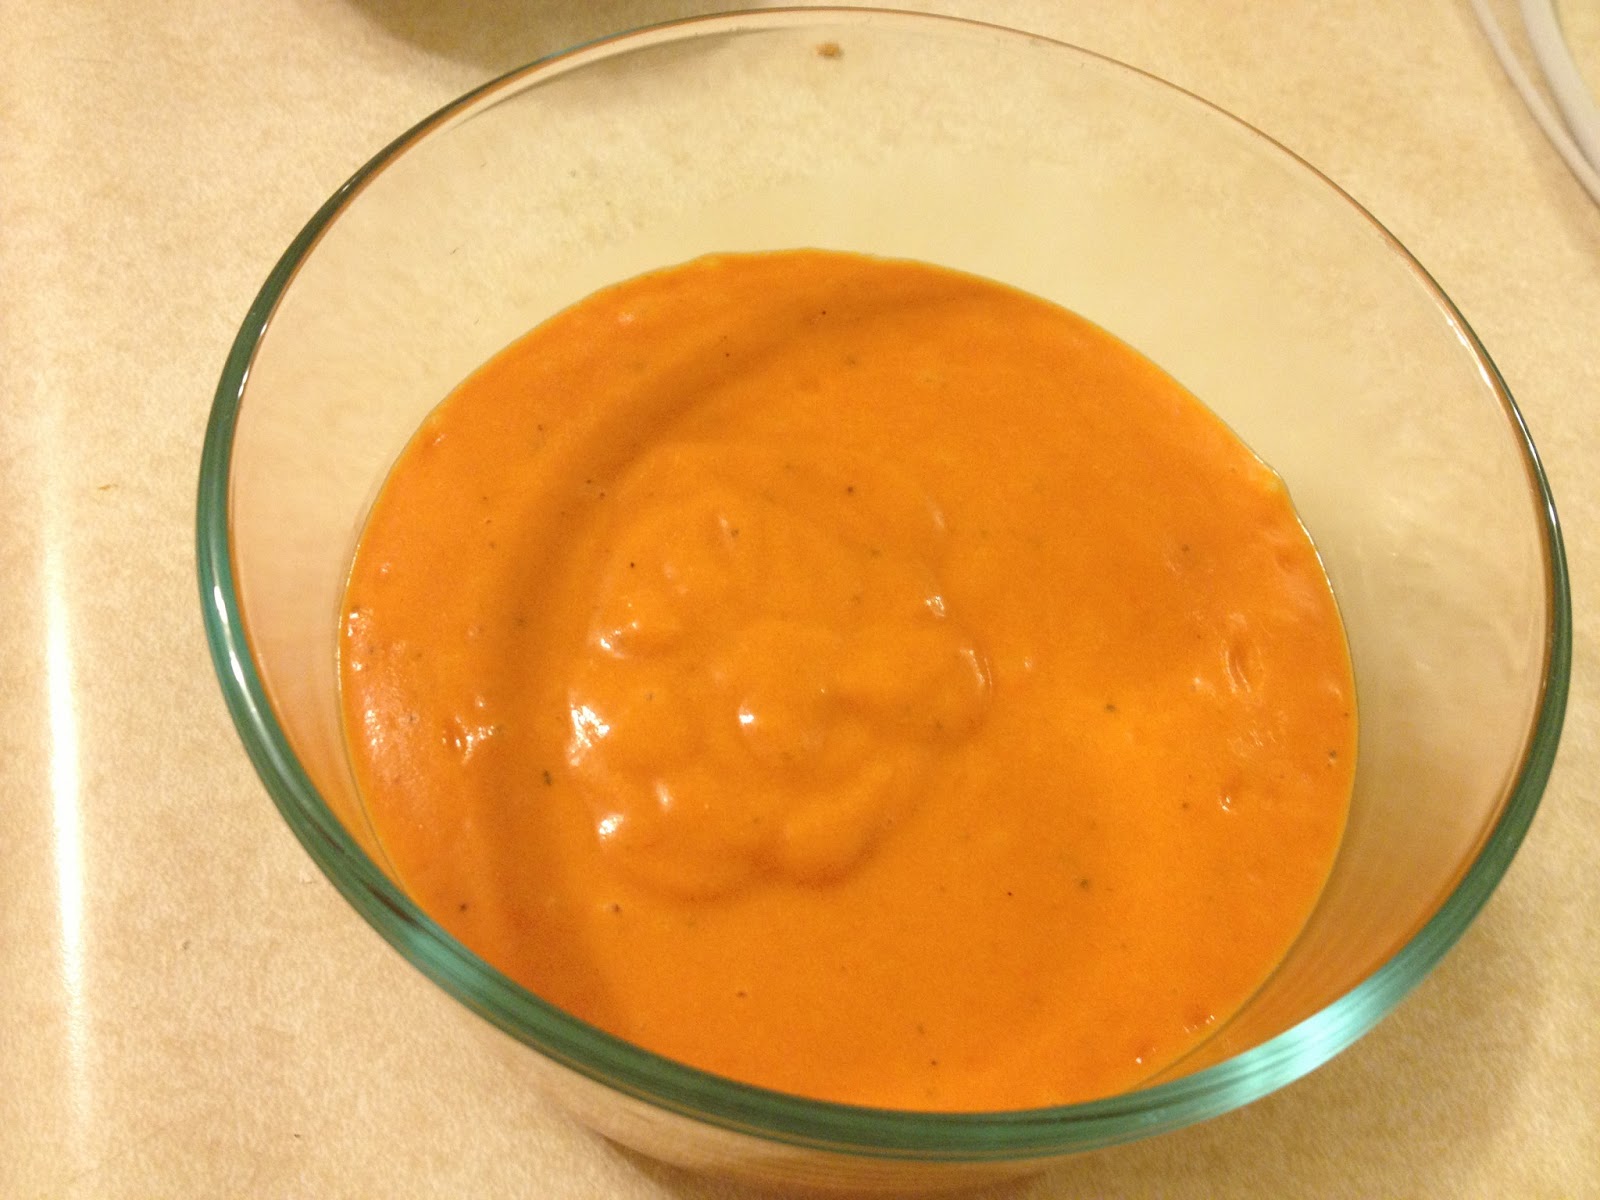
I've been obsessing over veggie soups a little.. You know, the creamy, comforting, luscious kind. The kind that sticks to your soup spoon and makes you scrape off the sides and bottoms of the bowl to get one last half spoonful.

So I went to look for a couple of ideas, and I thought about it a lot. And guess what? There are TONS of recipes, all just a LITTLE different from one another.. by an eighth of a teaspoon of salt, by the proportions of ingredients, by the cook time and the prep time.. all silly differences, in my opinion, cuz when you read the commenters' take on the original recipe, their alterations actually make the recipe someone else's recipe. You know what I mean?

I figured it's about time we put an end to all these cross-referencing how to make a bowl of pea soup, or edamame soup, or carrot soup, or whatnot. With a bit of common kitchen sense, taste sense, and a sense of adventure-- oh and sensibility haha-- you can make your own damn recipe.

So instead of just giving you yet another recipe (I lie-- there are recipes at the end of this post),  I thought the most sensible thing would be to dissect it and explain why these ingredients, why this step. I must warn you gravely that the measurements will be absolutely imprecise, but that's the whole point. Wouldn't it be lovely to waltz around the kitchen stirring away here, adding a sprinkling of salt there, with the music on and no freakin' STRESS? Yepp, it's possible. But you need to tune in to your senses of smell, taste, and intuition. And you start building it up here.


BASICS 

You need at least item from each class:


FAT

vegetable oil (olive, canola, sunflower. Neutral tasting, it will allow the taste of the vegetable to shine)
butter (salted/unsalted. If salted, obviously taste before adding more salt when seasoning! Adds oomph)
flavored oil EG: garlic oil (my favorite, it adds tons of flavor and for this reason will also go under seasoning)

reason: you will need some fat to add some richness to the soup, and the fat will add depth to the flavor profile when sautee-ing the vegetables, thus resulting in a more robust, full-tasting soup.


VEGETABLE

edamame (try mixing in a teaspoon of miso. It's fantastic)
carrot
asparagus
pea
corn
celery
cabbage (yes! even cabbage!)
etc

AND
onion (I recommend vidalias over yellows)
AND
potato

reason: you MUST have the onion to add depth of flavor. The onion, caramalized in the fat, will set the outline to the soup. The potato adds the backbone, the heartiness and calorific oomph that your tastebuds and stomach will appreciate, and together, these two humble vegetables will allow your chosen vegetables to shine through the soup. Some will say that the potato is not mandatory, but I say it is. Just choose to put in less if you are wary of super thick, rib-sticking soups (as I am).

LIQUID

water (neutral tasting, very important when thinning in the end)
chicken stock
vegetable stock


THICKENING INGREDIENT

milk (will definitely get you closer to the "cream of xxx" taste)
creme fraiche (can only imagine good things this will do to your soup!)
potato (it truly is the thickening ingredient, and enables the meal to be vegan or vegetarian. Like I mentioned earlier, play with the amount of potato to get to the right consistency)

reason: you need this to bind the soup together, or else the taste of the soup will not come together and it will just be a thin-tasting, insipid, oliver-twist-eque-"please, may I have some more"- mess.

SEASONING

salt (sea, kosher, smoked (eh,) pink, etc)
cracked black pepper
garlic oil (I recommend)
miso paste (for vegans or vegetarians who need more umami than what water or veggie stock can offer)
broken up sour cream and onion lays potato chips (my guilty pleasure)
ground cayenne pepper
a spritz of lemon juice (for brightness)


so pick at least one from each class, or mix around to find your favorite balance. Personally, for FATS I like a combination of garlic oil and butter.. Very delicious. For VEGETABLES, I have had great success with frozen peas, a carrot and corn blend, and edamame. I have always also used a mix of chicken stock and water as the LIQUID. The chicken stock adds great flavor, and I top it off with water to prevent the chicken taste from being too overwhelming.  Potato has always been my choice for thickening ingredient. I am not particularly fond of milk, and have my fair share quantity wise in the form of ice cream and yoghurt. For SEASONING, always salt and pepper and garlic oil. I've found that miso paste is particularly good in the edamame soup. It just taste so.. right. Like they belong together.


METHOD


Heat up fat in a medium sized pot. If you are using butter, take care not to let it brown. 
Add diced onions first, sweat over medium heat. 
reason: releases the sweetness.

Add the diced potatoes. When the potatoes start to brown along the sides, add in the vegetables, continue to sweat until softened, mixing often. Season with a little salt, and some pepper. 
reason: releases the sweetness, allows flavor profile to develop. Mixing prevents the veggies from steaming instead of sweating.

Add in your liquid, bring to boil, simmer until vegetables are tender. 
reason: you want soup, right! not a stir fry?? Also, make sure the vegetables are tender by tasting it. How long it will take to simmer depends on the size of the diced veggies, etc. Estimate about 20 minutes. Add just enough liquid to cover all your vegetables and simmer away, topping up with water if necessary. Do not add too much, as you will need to go through trouble-shooting steps to re-thicken. But you can always thin your soup out at the end with more water. There will be minimal if no more cooking after it reaches the blender. This is because the thick soup will bubble and burst in the pan, and can scald you. Very dangerous. So make sure everything is tender so you get a smooth soup, and not a soup full of unpleasant hard grains.

Cool mixture down before pouring into the blender. (I use ice cubes since I am terrible at waiting)You might need to do this is several batches if your total volume is large. This prevents hot liquids from spitting out from the blender, which can scald you badly.

Season to taste, add hot water if soup is too thick (I find through all my soup making that this is most probably so).

Measurements, did you say? WHAT? Even after such a thorough explanation of how things work? You big baby.

 A rough measurement would look like this. It depends entirely on how thick you want your soup to be, how hearty, how salty, how rich, and what types of vegetables you use. Naturally, legumes such as peas and edamames will require much less potato, and if you are using a sweet potato as your chosen vegetable, you probably don't need very much potato at all, unless you are hoping to lighten the taste of the sweet potato (not a bad idea). If you are using milk or creme fraiche as your thickener, you obviously will need MUCH LESS total liquids to cook with, duh. Don't get it? IT'S BECAUSE IT'S A LIQUID TOO.


My Edamame Soup

~1 cup edamame (I shelled it from 16 oz of edamame-in-shell)
1/2 russet potato (about 1 cup)
1/2 vidalia onion (about 1 cup)
1.5 cups chicken stock
1 cup water (1 additional cup of water to thin it out after blending)
salt, pepper, and hoba miso (a sweet miso)
1tbs garlic oil
1.5 tbs butter


My Carrot and Corn Soup

~1.5 cups fresh corn kernels (from 1 ear of corn)
2 cups carrots (chopped or diced so that it cooks faster)
1/2 russet potato (about 1 cup)
1/2 vidalia onion (about 1 cup)
2 cups chicken stock
1 cups water (additional for thinning)
salt, pepper to taste
1 tbs garlic oil
1.5 tbs butter

NEW! -- I just made this yesterday and I have to say, this was absolutely delicious. Use a longer simmer time to ensure that the celery is entirely tender.

My Celery Soup

5-6 stalks of celery, strings removed and diced (at least 3 cups)
1/2 russet potato (about 1 cup)
1/2 vidalia potato (about 1 cup)
1.5 cups chicken stock
1 cup water
salt, pepper to taste
1 tbs garlic oil
1.5 tbs butter


My Cabbage and Jalapeño Soup

shit-- I forgot to take photos.. or else this could go up as an independent post. This is what happens when I'm too motivated to eat what I cook, asap.

4 cups chopped cabbage (i used a green cabbage, but i'm sure you could use fancier ones like savoy, maybe even a red cabbage!)
1/2 Jalapeño (it could use up to one whole), diced, seeds and stem removed
1/2 russet potato (about 1 cup)
1/2 vidalia onion (about 1 cup)
2 tbs garlic oil
1.5 tbs butter
2 cups chicken stock (unlike other veggies, cabbage is rather bland, so I upped the chicken stock)
1.5 cups water
salt, pepper to taste

Same method, just make sure to put in the Jalapeño before the cabbage so it can blister and lend its flavor.


I hope this helps! Honestly, a lot of cooking involves trial and error. Your preferences will certainly differ from another's, and you will have to use your own intuition and imagination to come up with a bowl of hot, savory soup that you will be proud of serving.


photo credit:tvrage

trouble-shooting tips #1: if your soup is too thin (what did i tell you about not adding too much liquid??) simmer half a diced potato in lightly salted water, drain and mash with a fork in a bowl, then add it to the soup, and whizz in the blender OR add some more creme fraiche. I don't recommend more milk, can't imagine how that could help much since it is in itself so liquid-y.


Monday, April 29, 2013

I did it!! Spring Pea Soup


YES. We finally had soup and sandwich for lunch today. HURRAH! I feel very triumphant. You should know-- Pan is very picky, and he leans towards asian style meals all the time. All. The. Time. But today was different-- oh yes indeed-- i woke up early, fed the dog, embarked on a challenging task of making and drinking a kale smoothie, drank said kale smoothie and survived (I cheated and used naked juice to sweeten the deal) and went grocery shopping. Fuelled with a buzz that I had never felt before (I attribute it to the kale in the juice), I shopped for what I would have wanted to see for lunch. That meant turkey sandwiches and a light, smooth pea soup.

No pictures or even an appropriate recipe, because I was so high on life I didn't even measure anything. This girl is on fire!


Well, by the time Julian was up I had already cooked my soup and taste-tested some turkey and smoked salmon sandwiches (individually, obviously)  heh heh heh, and when he asked what was for lunch, i said

(nonchalantly, somewhat earnestly and willing-to-please): "oh I made some pea soup and was planning for us to have that with some sandwiches.. But I know you hate peas so if you really want I have an alternative menu I can cook up?"

Pan: "Oh well, I suppose we could eat that for lunch..."

Me cutting in: "Super! That would make me sooo happy. Are you sure? You are such a dear!"

HO HO HO! Reverse psychology FTW!


So we had pea soup and sandwiches for lunch. Unprecedented. I have been together with this man for over 4 years, and never had we had soup and sandwiches for lunch. What's more, he LIKED the soup! He actually LIKED it! In his words "Mmmm, this is good soup!" SCORE! For a man who has not eaten a SINGLE pea since he was 10 years old, and who turns his nose up on mashed potatoes, sweet potatoes, and pumpkin (and similarly, peas) because of their "mushy" texture. Good Lord I thank thee.

Here's my rough recipe. I had some beautiful chicken stock that came from steaming chicken drumsticks, so it was very concentrated and full of chickeny goodness. I am sure that a good (not swansons for this please), possibly organic store-bought chicken stock will stand in nicely.


SPRING PEA SOUP

Serves 4
prep time: 5 minutes 
total cooking time: 40 minutes 

(Image credits: http://www.velavanstores.com/green-peas.asp)


Ingredients

2 tbs butter
1 tbs garlic oil (recipe to come soon. YOU MUST MAKE THIS. IT IS IMPERATIVE.)  1 large russet potato, peeled and coarsely diced
1/4 vidalia onion, sliced (i'm sure a yellow onion would have been ok too.. I chose vidalia because I conveniently had a quarter in my fridge, and I like the soft, sweet texture) 
4 cups of shelled, frozen peas (obviously fresh would have been better)
pinch of salt and black pepper
1.5 cups chicken broth/stock 


Method:

Heat butter and oil up in a medium-sized pot on medium heat, add onions to sweat (5 minutes), then the potatoes (10 minutes), stirring often to prevent from sticking.
When the potatoes start to brown, add your peas, and season with some salt and black pepper. Try not to keep on tasting the mixture, or else you'd find that your end recipe only serves 3!

One recipe I found suggested putting some ascorbic acid in the soup at this point to keep the vibrant green of the peas from discoloring as it cooks. It suggested that you crush up a vit c pill if you did not have ascorbic acid on hand (well I don't, do you?
So just to report back, I tried this trick with some apprehension.. The color looked.. fine, taste wise it did not make the soup taste like citrus, so.. try it maybe?

Once all your peas are soft, cool your mixture down (I cheated and used 5 ice cubes to cool it down rapidly) and transfer everything to the blender. Make sure that the peas are entirely soft here-- there will be little to no more cooking after this step, and tough pea coverings are a let down to this creamy delight).
Whizz it in your blender, starting from the lowest setting to the highest, and keep your hand securely on the lid (cover the lid with a kitchen towel if you are afraid of hot liquid projectiles!), until the mixture is smooth.
 Pour it back into the pot, adding some more water to the blender to capture all your precious pea soup, and use it to thin the soup if you find it too thick.
 Reheat to simmer, taste for seasonings (salt, black pepper and garlic oil) if needed and texture (add more water or chicken broth), serve.


I don't like soups that are too thick with potato. A couple of months back I wasted two cans of artichoke hearts on a terrible recipe that called for too much potato, and i was left with a gummy mess. It broke my artichoke heart, so I always err on the side of using less potato in such creamy soups than too much.

Play around with this recipe! It is cheap and easy to make; you might as well tweak it to your liking ;) hopefully your partner will be as receptive to this soup as mine was. 


Edit: I tasted this soup cold (I had leftovers in the fridge). AMAZING!!!


Thursday, April 4, 2013

Quiet Bundle of Crazy in the Kitchen


hi ya'll. I'm currently writing a new post on another recipe I know you will I love, but it's rather difficult to do, see.. because of this little bundle of joy we just welcomed into our household.

say hello to Poppy Thunderpaws Pan. Yes, she's taken on Pan's last name. That's how we know she's one of us. We love her to bits, but she's a freakin' handful and then some!

It's been close to impossible trying to write my post on the Mrs Lee Spaghetti, because I write some, then run after her to make sure she pees in the right spot, then come back to finish my thought, then run after her to stop her from chewing the table leg off.. and then when she's done aggravating me to my core and goes off for a nap, I come back to my post only to discover to my horror.. what the heck happened here? why am i writing in two voices? Why do i sound so snarky, then stupid, then downright like.. Martha Steward? (no offense, Pan just bought me a year's subscription of her magazine).

But I love my Poppy Pan. She's a doll who wants to please. She's my baby who goes into her crate to nap (when the doggy bed is being washed), she's my baby who wouldn't finish her food unless it's delicately soaked in water.. She's a beautiful BLUE, for heaven's sake! And have you seen her eyes? I need a close-up of her eyes. They are the lightest, bluest blue eyes. Who ever thought I'd have a blue-eyed baby? Genetics be damned. I bought my sexy baby.

So to all of you with a bun in the oven/a pet in a crate/a boyfriend on the bench/a mistress on the side.. congratulations, honey. You've just earned yourself a quiet, rewarding bundle of crazy.


Edit: FINE! PICTURES!


 Poppy's first night home. Yes we lavished her immediately with presents and toys galore. Lucky girl. 


 My beautiful baby hanging out in her crate. She loved her crate! Made it so much easier for us to crate train her whew! 


 "Did I hear you call me sexy? I'm too young for that shit!"


Saturday, March 23, 2013

nice try, Michelle


One thing I do pride myself on is my ability to be a resourceful cook. I love scavenging, saving money, being thrifty, and dressing like a hobo. I would love nothing more than for someone to take me foraging for food in a forest.. or to teach me how to dress a deer, roadkill or game--to be able to utilize everything from the various cuts of meat, to the bones and tendons and offals.. OOOOH! i do relish the thought.

though that will not probably happen in the near future (to Pan's relief and my dismay), one thing I am licensed to do is forage around our kitchen looking for things to put together for a meal. Since Pan is away, I was tasked this afternoon with preparing lunch for one. I think it's close to insanity to try preparing asian communal meals-- you know the 3 dishes 1 soup and rice-- every day for one person, so I try to avoid that and eat simply when he's not around. One thing I found in our freezer was some cheap sausage meat we bought in bulk in Sam's Club. Should not have bought it. No offense to sausage lovers (of every kind), we utilize sausage in various means, from cooking pastas to stir frying with potato and kale (dead good, btw, if you caramelize the onions good) and the like, but home-made is waaay better than store bought, especially when it's cheap industrial crap sold in bulk. No fault of Sam's Club, which we dearly love; I can only blame our piggish appetites and greed for purchasing it.

So.. for lunch today, I found some leftover rice in our fridge (a common sight), half an anaheim pepper leftover from a penang assam laksa dish I made for friends yesterday, (notes to come another time) and said bulk sausages languishing in our freezer for over 4 months. Gross.

So what did I do? I popped the sausages in the toaster oven for 10 minutes, on low first to defrost then then broiled them on foil, chopped the pepper up, mixed it with some rice, and popped it in the microwave for a minute twenty. After which i sliced the sausage up and mixed it into my rice.


Mmmmm.. That be some yummy shit, said my mouth after 2 bites of hot steaming rice, rich, juicy sausage and fresh, mild pepper. Then, it became a struggle to finish the dish. The greasiness of the sausage, the oldness of the meat.. Too much. I wrapped up lunch (ate it all, of course, no waste) and had to remedy the situation with a fresh orange ¡pronto! at the sink. You know when you have to rush and get some fresh fruit into your system, it means that you just had a very greasy, unhealthy lunch. It's kinda like throwing up in the sink, but instead of letting food out, you put more food in. Yep.


That fateful dish spurred me on to document this soup, which I know you will I love dearly. It's light, full of umami, and so so good for you.

It's very rare for Cantonese to cook with pumpkin; in fact, I don't think I've ever seen my mom deal with this gourd-like squash. I found this soup online and tweaked it, especially the cooking times, and I've been making it repeatedly (to Pan's dismay; he hates eating the same food over and over again). Please try it, it's fantastic.


Kabocha, Pork and Dried Scallop Soup

Dead simple soup; I've memorized the ingredients, and here is Michelle Lee to walk you through the steps!

" Hi folks! You need 3 classes of ingredients:

1) your dried ingredients, which today will comprise of dried scallops, North and South Almonds (nam hung, buck hung), and a dried octopus.


2) Pork; I like meaty pork bones. They are cheap, and very flavorful. Take care to blanch them in boiling water though, to get rid of excess grease and blood. (I boiled them for a good 5 minutes with lots of water)

3) Your kabocha pumpkin. Find one that is heavy for its size, and with a dark green rind. The rind is edible, so wash it clean before preparing it.


That's it! Season with salt and sugar at the end if you must, but I have never found the need to do so, since the ingredients provide all the savory-ness and sweetness necessary.

Method; quick, simple-like.

Blanched, cleaned pork bones, dried ingredients, cold water, bring to rapid boil.


Lower heat to a simmer, simmer away for 1.5-2hours.
The stock should turn cloudy, and your whole house will smell soooooo yummy. It's the dried seafood at work.


Add the cut up kabocha pumpkin (seeds and strings removed), and return to simmer for 20 minutes tops. The pumpkin should be firm at the center, and fully cooked. Remove unsightly octopus that has already served its purpose. Season with salt and sugar if necessary. Serve up!


I say twenty minutes because the kabocha will have a tendency to dissolve into the soup, turning it into a halloween-orange liquid. Some people like it, others (Pan) don't. I think it's nice when there is a slight tinge in the broth, but any more than that and it's like eating a pureed pumpkin soup, which this is not. One thing I do do (not doo doo.. whatever) is slice off the pointy tips that tend to dissolve ultra quickly into the soup, since the surface area exposed to hot liquid is very high, hence rate of dissolution is very high. Should I draw a graph to explain this? Do I have to? Please say no.


 Just some artistic shots. Here, some pieces of pumpkin, along with its innards, delicately tossed on its deathbed. It is called "Abstract Art: Kabocha, Loved, Dissected, and Revealed.".


'But what about the proportions?' Do I hear you say? Indeed. I think a ratio of


# of servings
Water (litres)
Dried Scallop (pieces)
North Almonds
(heaped tsp)
South Almonds
(heaped tsp)
Dried octopus
(piece)
Meaty Pork Bones (oz)
Kabocha (oz)
2
1
6
1
1
0.5
8
6
4
2
12
2
2
1
16
12
6
3
18
3
3
1.5
24
18
8
4
24
4
4
2
32
24


is a good approximation. Approximation I say, because I'm not very sure. I mean, the size of your dried scallop or the quality is probably different from mine. How meaty your pork bones are different from mine. What if you decide to use ribs? Some like to add lots of those fried almond anyway, other don't. Fuck. Isn't this post useless? Heck, just try it anyway!


As you can see, the kabocha I bought weighed in at a staggering 1lb 13 ounces. I did not use all (I followed the guide above); I cut myself a nice wedge and steamed it for a snack. "